
Summer Starts Here - Save up to 70%
To see if this custom-fit item will work for you please tell us what vehicle you'll use it with.
Thank you! Your comment has been submitted successfully. You should be able to view your question/comment here within a few days.
Error submitting comment. Please try again momentarily.
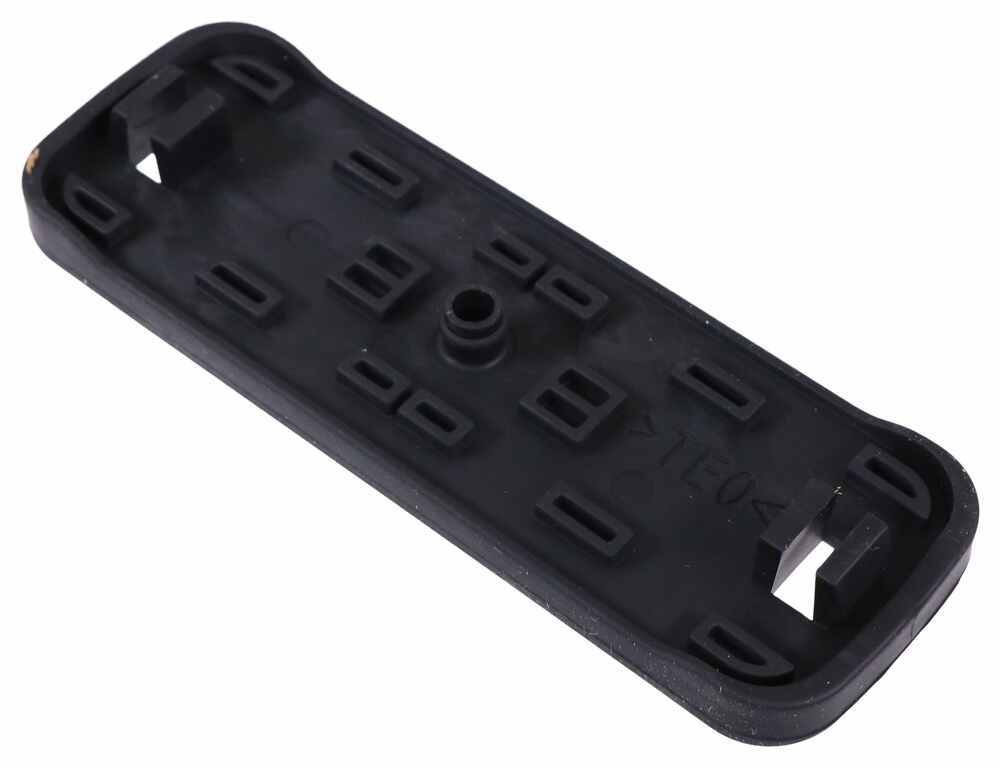
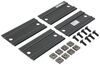
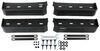
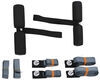
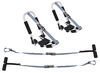
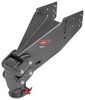
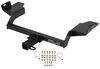
This custom fit kit lets you mount 4 Rhino-Rack 2500 legs to your vehicle with a naked roof. Clamps mount to legs with bolts. Includes 4 clamps and 4 pads.
Features:
Specs:

Videos are provided as a guide only. Refer to manufacturer installation instructions and specs for complete information.
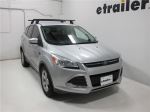
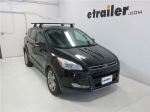
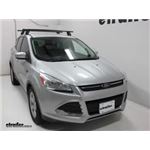
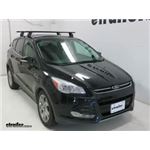
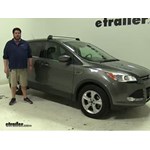
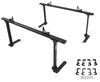
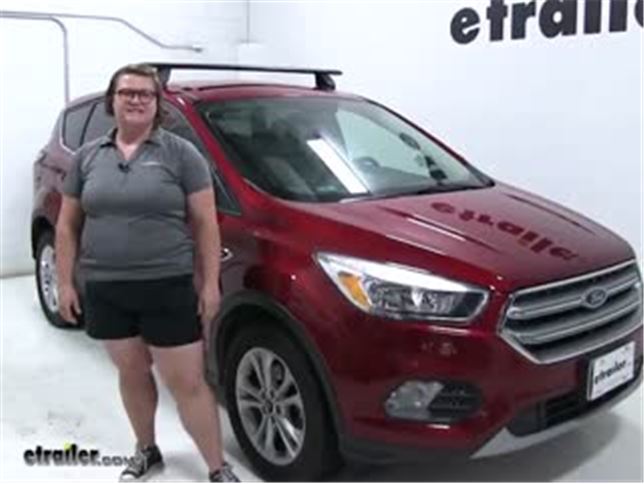
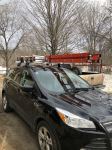
Speaker 1: Today on this 2017 Ford Escape, we're going to be taking a look at and showing you how to install the Rhino Rack Vortex Aero roof rack system. That's including part numbers RRVA-137B-2, that's the Rhino Rack Vortex Aero cross bars in black. These are also available in silver, part number RRVA137S-2. Also, the Rhino Rack 2500 series legs for the Vortex Aero cross bars. That's part number RRRLKVA, and also the custom DK fit kit, part number DK375. The nice thing about this kit is that it's going to come with everything you need.
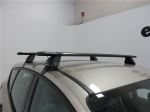
First we're going to be looking at the front bar. The bar is installed exactly the same, but for installation purposes, it's easier just to show the first one.So, we're going to have an aluminum bar. It's going to resist rust and corrosion. Goes all the way across our roof with a little extension there, so you can add extra accessories on the end. Comes with the locks you need.
They're all keyed alike, and it comes with two keys, so you can keep all your gear safe. It's also going to have a little locking end on the end of each bar. Now, these cores can be replaced with a locking system. That's available separately, but it's going to be safe and secure for all your accessories and with a nice black finish, it's going to match just about any other car.Using our key, we can unlock the cover and look inside. Here is where we're going to attach the custom fit kit.
This is going to include a clamp which is going to go around your naked roof, and also a rubber pad that's going to adhere or conform to the shape of your roof. The nice thing about these is that the clamp and the rubber pad are going to protect your roof from any damage, since there's a rubber pad here, so you don't have to worry about any scuffs or scratching on your roof.Now we can replace our cover just by sliding those two ends in here. Now, I do want to give you a measurement to show you how high this sticks up off of your roof. If we go about as far as I can reach in here, from the top of the roof to the bottom side of the bar, it's going to be about three and three eighths of an inch, and then from the top of the roof to the top of the bar is just about four inches. You should have plenty of space in between there to get any accessories mounted, but it's not going to be so high above your roof that you should have much trouble getting into most garages.Now, we'll show you how to install the rear bar.
Again, these just install the exact same way. We've got our bar sort of half-assembled here, with one leg kit on one side and the clamp installed. We'll show you how to do the other one. The easiest way to do it, you flip the bar over and then you're going to grab one of your leg kits. It's important to note in the instructions, it'll have a note about where the arrow is supposed to be placed if it's going in or out. Ours is facing out, and then we can take out rubber pad and place it onto our leg kit. It's also important to note which number goes for what foot. There'll be directions on which one goes for the front, which one goes for the rear. There's also a little included tool for that end cap on the bar, so if you just come and place that in the end, turn it, pop out the cover.Now, we can take our leg kit and you're going to slide this little square bracket into the channel on our bar. You might have to loosen up that nut. There is a included tool with your kit so you can loosen that and tighten that as needed, but for right now, we'll slide that on. And then there'll be a measurement in your instructions to place in a little slide. Now, it's a little rubber piece that has all the markings on there so you can measure that out, but for demonstration purposes, we're just going to be using some flat tape. We'll measure that out going from the inside of that channel out to the end, and you just want it to come . If you are using flat tape, you just want to come to this little indent here, so our table measured right to there, and then we can tighten down our leg kit. The nice thing about the tensioning tool is that it does have a built-in torque ability. So, whenever this is tight, the end of this little tool will go straight. We'll talk about that again whenever we actually tighten down our roof rack to the system.So, now we can attach the clamp. You're going to remove that bolt inside there to put it in place, and replace the bolt. You just want to put a few turns for now, because we want to give ourselves plenty of room to get this in place, and it's always easiest whenever this is loose. You just want it to be secure so it doesn't fall off, but not so tight that you can't get it around the roof. With that on there, can replace our end cap. Want to be sure you have it going the right direction. It does have one way to go in there, and then lock it down. With our rear bar assembled, we'll open up the doors on both sides and it does make it a little bit easier to have a second set of hands, but you don't have to have one. It's just always nice to have a buddy.One quick note I want to mention with our rear bar and the front is to pay attention to the arrow on the pad. You want that to be facing forward in this case. So with this flipped over, facing forward would be that way. We'll set it down, get everything situated, make sure that our bar is sitting evenly, and then we can grab our flat tape again and measure it out. You're going to be measuring from the center of one bar, the first bar, to the center of the other. This just makes sure that you have it in the right location and that it's even on both sides. Now we'll go do that on the other side as well, and you can find all the measurements for this in your instructions that come with your kit, so there's no guesswork involved. And once we have that, we can start snugging up our clamps. I'll just get this one going a little bit on this side until it's snug, and on this side, actually need to loosen it up a little bit. Because you just want this clamp to go around the side of your vehicle.So, loosen that up, and then we can slide it over, snug it up, and once that clamp is sitting pretty flush against the edge, we can start moving back and forth between each side to evenly tighten it down. You don't want to tighten all the way on one side and get it bound up on that side, and then it not fit correctly. So just move back and forth until you get everything snug. Whenever this line here goes from curved to straight, you'll know that you have it torqued down, and that'll be the same thing whenever you're assembling your leg kit. That way, you know you have it all the way tight. See there, it's going straight. We know that one's tight. We'll make sure it's tight on the other side, and that's a really nice feature from Rhino Rack, that you don't have to be like, "Oh, is this tight enough Is it too tight" Because you don't want to crush your roof line.All right, so that's good on this side. We can close our door and close the door on this side, and now we can grab our locking covers and replace those. Get the cover in place. You've got those two little notches. They're just going to fit in right there. We can slide it in, snap it over, and then lock it closed. Now, another thing to keep in mind with this is that you do have a weight capacity of 165 pounds, but of course you want to check with your Escape's owner's manual to make sure that it can withstand that amount of weight. That's going to be it for our look at the Rhino Rack roof rack system on our 2017 Ford Escape.
Average Customer Rating: 4.7 out of 5 stars (3472 Customer Reviews)
This custom fit kit lets you mount 4 Rhino-Rack 2500 legs to your vehicle with a naked roof. Clamps mount to legs with bolts. Includes 4 clamps and 4 pads.
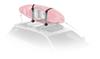
I used this rack to mount two 65lbs kayaks to my vehicle and travel. One of many trips was over a thousand miles (round trip) and they moved maybe half a centimeter a piece during. I was extremely pleased with how easily I could adjust them. The original shipment had everything that was supposed to be in it and the directions were realitively clear. I had them together and on in roughly an hour. When they are off the roof the only issue I have arises. The rubber feet that sit directly on the roof tend to fall off easily. Not a big deal.
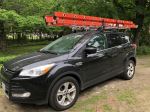
These work great. I’ve had an 80lbs 32ft extension ladder strapped down going 80mph on the highway and it was held in place.
Rhino-Rack is an excellent system for securing your kayak/cargo to your roof.
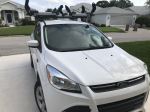
I installed this by myself. It was very easy . Sometimes I found the instructions vague but the online installation video helped me when I wasn’t understanding what to do. I would recommend this product to my friends for sure. It looks great on my Escape. Loading up the SUP Boards in the morning. Can’t wait.
2016 Ford Escape Naked Roof... Easy to put together, easy to put on. Haven't actually used them yet, but the weekend is coming. They got here quickly and with no problems. (the J carriers are from some place else)
The rack fit perfectly and was easy to install with the directions provided.
Rhino roof rack for my 2013 Escape. East to install. No maintenance. Good service. All good!

Patrick

1/24/2023
Once installed I’ve left it on and have been impressed with not only its durability but relative quiet when the sunroof is open. Not perfectly quiet but much quieter than expected
Very happy with this product at the one year mark. No slippage or loose hardware. I wanted a wide flat rack for hauling kayaks and/or bikes and this product gave me enough real estate for both at a far more modest price than other brands.
I'm thinking of replacing the curved and narrow factory rack on my other vehicle with a Rhino as well.
The web site was easy to understand and easy to navigate for ordering all of the right parts for our truck. When all of the items arrived (on time), everything fit perfectly and was easy to install. Plus the price was better then other sites we visited and all of the items we ordered were in stock at the time. We would have no hesitation about ordering from etrailer.com again.
The Rhino Rack is very well made. I installed it my self on our 2016 Ford Escape, but had an assist from my wife to fine tune it at the end. There was no whistling or any other distracting wind noise on our 3,500 mile drive to visit family out West. A Sear's Cargo Box was easily mounted to the Rhino Rack and it remained centered and secured at western highway speed limits plus. The included locks on the roof mounts were the selling point for me. The Rhino Rack remained securely mounted to the roof with no additional adjustments or tightening being needed. Great Product. Donna P. @ etrailer was super with the order.
Very pleased with my purchase. The videos made it really easy to put together and install.
Rhino rack with kayak rack for Ford Escape. Easy install very sturdy. Kayak attachments fold down when not in use. Etrailer delivered!
As always from etrailer.com, a great product at a reasonable price. Customer service help was not necessary in this case to choose the best product for my vehicle and needs, but has been a painless process for other needs in the past. Etrailer.com is my go-to for aftermarket cargo hardware needs.
As always, however, the manufacturer (not etrailer.com) provides marginal instructions. In spite of that, initial assembly and installation on my wife's 2016 Escape took about an hour, and it looks like the rack will do a great job for us on family trips. I anticipate removal or reinstall Atkin in the future to take less than 15 minutes for one person.
The Rhino roof racks with accompanying legs, pads and clamp kit are well designed for both fit and finish. The instructions are clear and precise and follow in a logical sequence! I would definitely recommend these roof racks for transporting kayaks , bicycles and other loads within the weight capacity stated!
This did everything that was promised. The rack held tight over 600 miles of road, at least half of which was in wind and rains. The instructions were very clear, and the only difficulty in getting the racks on the roof is that we were having 2 days of heavy rain and winds. Otherwise, it was a snap. The only issue I had was the rubber caps that go over the screw which hold the leg onto the bar itself. There is insufficient space for the rubber cap to slide through the bar. I can't see why the cap is necessary anyway, as the screw is not exposed to the elements at all
Product came quickly and as described. I would rate it higher but there wasn't the measurement needed to set the brackets horizontally, I had to figure it out through trial and error. Also, a high pitched whistling sound is heard at high speeds when the air moves across the grooves in the bars. Functionally there is nothing wrong with the product and it works well as intended for my 2015 Ford Escape.
The quality of the roof rack is great. The locking mechanism does not provide any actual protection, its cheap plastic and can be easily broken with your hands and some pressure.
Perfect fit - durable - after initial installation it's very easy to take them off and on as needed. Very happy with the product.
Excellent site. Videos helped and made it easy to install and get the right luggage rack system for my particular vehicle. Shipping was right on time!
Good product! Installer said it was a bit confusing to install.
Just received the parts. Haven't installed yet, so don't know about fit, quality, performance. Salesperson was helpful.

Gary
4/13/2020
Working Great! Helpful videos to support installation.
The roof rack was simple to install and very well made
Good solid product. Completely satisfied. Possibly a little more than some wish to spend but sometimes quality reallly does mean you get what you pay for.
Product worked great and was easy to assemble. I have used it for about 1 year and have no issues.
Great quality, easy to install and super quiet on the road. Shipped relatively quick during Corona shutdown.
Do you have a question about this Roof Rack?
Condition: Like New
Notes: May have damaged packaging or minor cosmetic blemishes.
Info for this part was:
At etrailer.com we provide the best information available about the products we sell. We take the quality of our information seriously so that you can get the right part the first time. Let us know if anything is missing or if you have any questions.


Karen
9/7/2023
This roof rack has been awesome. I have carried heavy loads of lumber, large sailboat parts water tanks, booms and it has performed well and without worry. To go from an empty roof to this rack was worth every penny. Would definitely recommend and/or buy again.